


Tracks of animals that have been made in soft ground can be preserved by making a cast with plaster. The easiest tracks to preserve are those found in mud,  wet ground, or snow. Wet sandy areas near creek beds often provide some of the best tracks. Once a clear track has been found, the first step is to brush away small stones, twigs, and excess dirt from around it, using a brush or stiff piece of grass. If there is water in the track, use an eye dropper to remove as much as you can without disturbing the track.
Next make a frame around the track with cardboard, plastic or wood strips. The simplest and most portable method is to surround the track with a strip of light flexible plastic strip that is about 1 1/2" (2cm) wide. Cardboard can also be used, but it isn't as durable and won't release as easily. The plastic forms a circular dam around the track and is secured with a paper clip or with two locking notches cut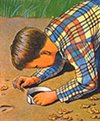 halfway through the top and bottom near each end. The frame should be just a little larger than the track. Press the frame into the earth lightly; don't press it in if it will disturb the print. If using a square, wooden frame, the outside corners can be sealed with a little modeling clay.
Mix plaster of Paris with water at a ratio of app. 2 (plaster) to 5 (water). (Plaster of Paris is convenient and inexpensive, but can be a little crumbly. Modeling cement can be used if you need a more durable cast, but it is heavier and not as easy to use in the field). Add plaster to water, not the other way around. The plaster should be the consistency of thick cream. If it is mixed too thin, the cast will be brittle; if too thick 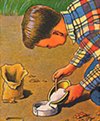 it will be soft and crumbly. You will need enough to make a cast at least .75 inch (20mm) thick. Larger casts should be thicker and, if very large, reinforced with rigid metal wires or mesh. Don't be tempted to make very thin casts of small tracks, as they will break easily. Pour the plaster gently to avoid disturbing the track, especially in loose sand or snow. Let the cast set up until it is firm enough to move. How long this takes depends on the size of the cast, but it usually requires about 30 minutes.
If the track is in wet snow, first sprinkle a little dry plaster into the track, just dusting it. Allow this to dry before pouring the plaster. If the snow is dry and powdery, spray a little water from a misting bottle into the track and allow this to freeze before pouring the plaster. It is important to pour the plaster gently in order to avoid distorting the track. If the temperature is below freezing, the cast may freeze before setting. If this happens, remove it and take it indoors. You should leave it in the frame in this case. Once it warms up, it will be soft, so it should not be handled. Set it impression side up and allow it to set.
After the plaster is set, carefully remove the frame (which can be reused) and lift the cast. Brush away any heavy dirt remaining, but don't try to thoroughly clean it at this point. Wrap the cast in newspaper to protect it during the trip home. The cast should be allowed to set up for a few days, giving it time to completely harden. Once set, you can clean off any remaining dirt with an old toothbrush. It is a good idea to label, in pencil, the location, date found, and identification of the animal (once determined) on the back of the cast. Some collectors paint the plaster surrounding the actual track before displaying. This helps to "set off" the track from its background. If you need help identifying the animal that made the track, check with your local library for a field guide.
The casts you make this way are actually impressions of the feet of the animals that made the tracks. If you want to make a "positive" cast of the track (depression), place a plastic frame tightly around the cast so that it extends an inch or so above. The side with the impression should of course be pointing up. Fill in any gaps around the edges with paraffin. Grease the first cast and frame well with petroleum jelly. Pour plaster on top of the cast. If you wish, you may insert a loop of wire into the wet plaster so that the cast may be hung. Once the plaster hardens, you should be able to separate the two easily. WARNING: Sometimes this does not work as well as it should, and the cast may not release, or the original may break. It is recommended that a one of a kind or rare cast not be used.
You can also make casts using wax. Use the same sort of frame and drip candle wax over the track until it is completely covered and thick enough to be handled when cool. A positive of this cast can be made in plaster and the wax original melted away with low heat. A hair dryer will usually suffice. Wax will make a lighter cast and is easier to transport if many casts are being made. It also sets up faster than plaster. However, it is easy to break a wax cast and they may melt on hot days.

Peterson Field Guide to Animal Tracks: Third Edition
Scats and Tracks of North America: A Field Guide To The Signs Of Nearly 150 Wildlife Species.
This article was printed from the Bizarre Labs website at bizarrelabs.com
